0.wordpress安装包连接链接:
https://pan.baidu.com/s/1zJkpRb1gIfDJVELL0hBNeg
提取码:0124
--来自百度网盘超级会员V3的分享
1.LNMP架构概述
0.配置官网YUM仓库
vim /etc/yum.repos.d/nginx.repo
[nginx-stable]
name=nginx stable repo
baseurl=http://nginx.org/packages/centos/$releasever/$basearch/
gpgcheck=0
enabled=1
gpgkey=https://nginx.org/keys/nginx_signing.key
1.安装nginx
yum -y install nginx
2.创建用户
groupadd -g666 www
useradd -u666 -g666 -M -s /sbin/nologin www
3.修改nginx配置文件
/etc/nginx/nginx.conf

4.启动nginx
sudo systemctl start nginx
5.检查nginx状态
sudo systemctl status nginx
6.加入开机自启
sudo systemctl enable nginx
2. 安装PHP服务
0.卸载低版本php
yum remove -y php*
1. 安装工具
yum install -y yum-utils
2.更换yum库
sudo yum install -y https://dl.fedoraproject.org/pub/epel/epel-release-latest-7.noarch.rpm
sudo yum install https://rpms.remirepo.net/enterprise/remi-release-7.rpm
3.启用模块
sudo yum-config-manager --disable 'remi-php*'
sudo yum-config-manager --enable remi-php80
4.安装php
yum -y install php php-cli php-common php-devel php-embedded php-gd php-mcrypt php-mbstring php-pdo php-xml php-fpm php-mysqlnd php-opcache php-pecl-memcached php-pecl-redis php-pecl-mongodb --nogpgcheck
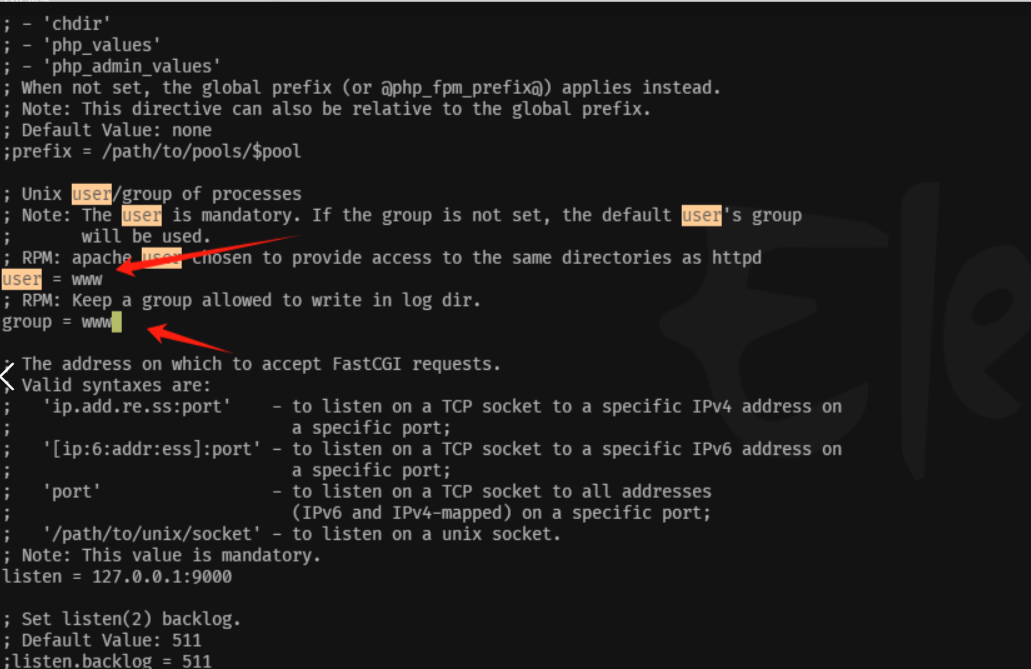
5.修改php启动用户
vim /etc/php-fpm.d/www.conf
6. 启动php
systemctl start php-fpm
7.查看php状态
systemctl status php-fpm
8.php加入开机自启
systemctl enable php-fpm
3.安装数据库mariadb-server
1.安装服务
yum -y install mariadb-server
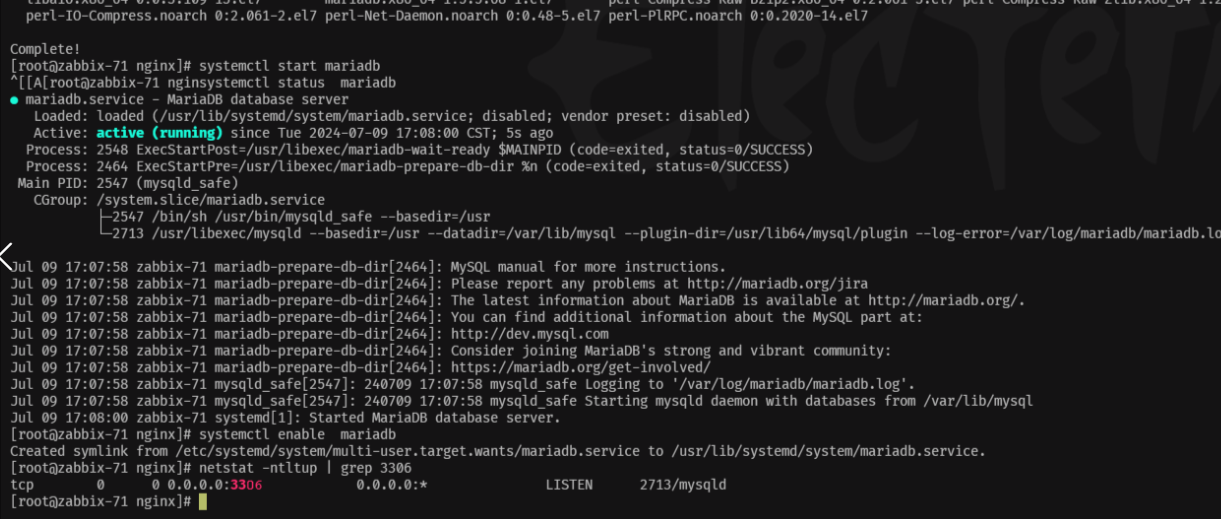
2.启动数据库
systemctl start mariadb
3.数据库加入开机自启
systemctl enable mariadb
4.查看数据库端口是否存在
netstat -tnulp |grep 3306
5.配置登录密码 默认用户root
mysqladmin password 'xxxx'
6.测试登录
mysql -uroot -p'xxx'
7.查看当前数据库
show databases;
4.部署wordpress服务
1.创建代理文件
vim php.conf
server {
listen 80;
server_name php.xiaodu.com;
location / {
root /wordpress;
index index.php index.html;
}
location ~ \.php$ {
root /wordpress;
fastcgi_pass 127.0.0.1:9000;
fastcgi_param SCRIPT_FILENAME $document_root$fastcgi_script_name;
include fastcgi_params;
}
}
2.解压代码文件
unzip wordpress-6.4.3.zip -d /
3.重启nginx
systemctl restart nginx
5.访问wordpress
http://php.xiaodu.com
1.修改目录权限
chown -R www.www /wordpress/
2.创建wordpress库
mysql -uroot -pxxx-e "create database wordpress"
mysql -uroot -pxxx-e "show databases"

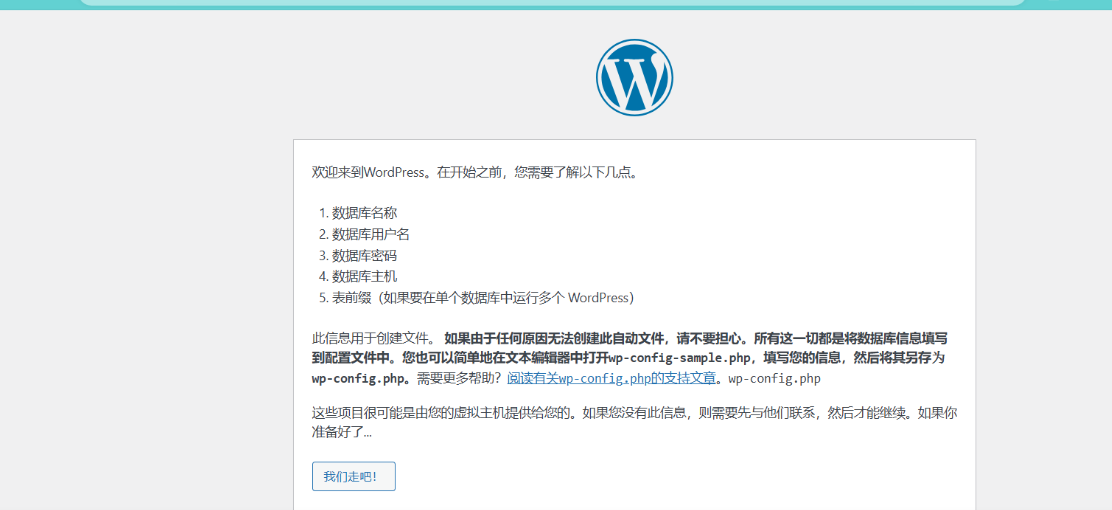
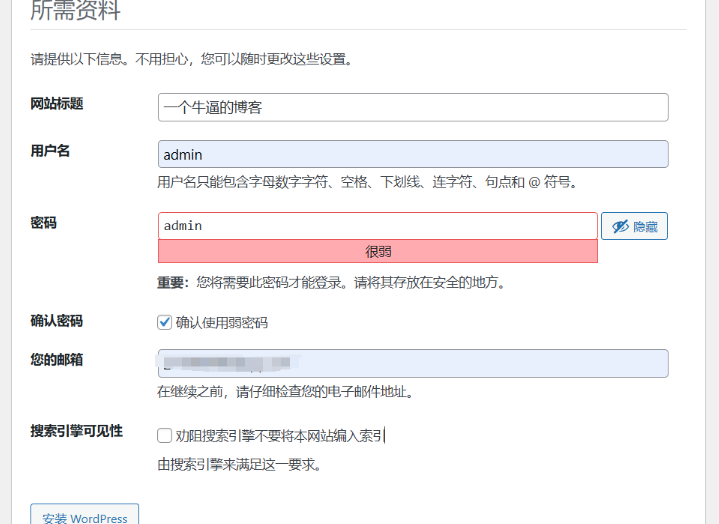
3.运行安装
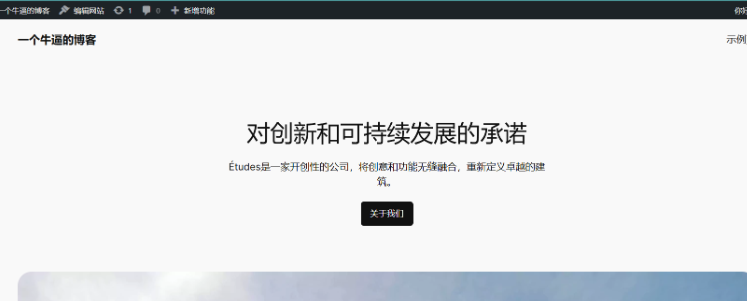
5.安装完成


文章评论