准备
老规矩,为了以防万一先关闭防火墙和 seLinux:
systemctl stop firewalld
systemctl disable firewalld
setenforce 0
要想永久关闭 selinux,需要修改配置文件 /etc/selinux/config,设置 SELINUX=disabled。
另外需要注意的是如果想部署多节点需要提前把节点 hostname 和 ip 的映射写入 /etc/hosts。
加载内核模块 br_netfilter
modprobe br_netfilter
echo 1 > /proc/sys/net/bridge/bridge-nf-call-iptables
echo 1 > /proc/sys/net/ipv4/ip_forward
安装 kubelet kubeadm kubectl
安装之前先配置 kubernetes 的 yum 源
创建文件 /etc/yum.repos.d/kubernetes.repo 写入下面内容:
[kubernetes]
name=Kubernetes
baseurl=http://mirrors.aliyun.com/kubernetes/yum/repos/kubernetes-el7-x86_64
enabled=1
gpgcheck=0
repo_gpgcheck=0
执行 dnf 命令安装:
dnf install -y kubelet kubeadm kubectl
安装 containerd
从 containerd release 页面 https://github.com/containerd/containerd/releases 下载最新 containerd 压缩包,
下载完成后通过 xftp 或者 winscp 或者 lrzsz 上传至部署节点,并解压至 /usr/local 目录
tar Cxzvf /usr/local containerd-1.6.8-linux-amd64.tar.gz创建一个 systemctl 的 service 文件 /usr/lib/systemd/system/containerd.service,写入下面内容:
[Unit]
Description=containerd container runtime
Documentation=https://containerd.io
After=network.target local-fs.target
[Service]
#uncomment to enable the experimental sbservice (sandboxed) version of containerd/cri integration
#Environment="ENABLE_CRI_SANDBOXES=sandboxed"
ExecStartPre=-/sbin/modprobe overlay
ExecStart=/usr/local/bin/containerd
Type=notify
Delegate=yes
KillMode=process
Restart=always
RestartSec=5
# Having non-zero Limit*s causes performance problems due to accounting overhead
# in the kernel. We recommend using cgroups to do container-local accounting.
LimitNPROC=infinity
LimitCORE=infinity
LimitNOFILE=infinity
# Comment TasksMax if your systemd version does not supports it.
# Only systemd 226 and above support this version.
TasksMax=infinity
OOMScoreAdjust=-999
[Install]
WantedBy=multi-user.target
创建 containerd 配置文件 /etc/containerd/config.toml,并填入以下内容:
version = 2
[plugins."io.containerd.grpc.v1.cri"]
sandbox_image = "registry.aliyuncs.com/google_containers/pause:3.7"

这里重点就是设置 pause 容器的仓库地址,默认的 gcr 仓库在国内是无法访问的。
然后执行命令
systemctl daemon-reload
systemctl enable --now containerd
安装 runc
从 runc release 页面 https://github.com/opencontainers/runc/releases 下载最新 runc
下载完成后执行命令:
install -m 755 runc.amd64 /usr/local/sbin/runc
安装 cni-plugin
同样的使用迅雷从 github release 页面下载 https://github.com/containernetworking/plugins/releases
下载完成后执行命令:
mkdir -p /opt/cni/bin
tar Cxzvf /opt/cni/bin cni-plugins-linux-amd64-v1.1.1.tgz
初始化环境
在当前目录创建一个 kubeadm-init-config.yaml 文件,填入以下内容:
apiVersion: kubeadm.k8s.io/v1beta3
kind: InitConfiguration
bootstrapTokens:
- token: abcdef.0123456789abcdef
  ttl: 24h0m0s
localAPIEndpoint:
  advertiseAddress: 10.0.0.66
  bindPort: 6443
nodeRegistration:
  criSocket: unix:///var/run/containerd/containerd.sock
  imagePullPolicy: IfNotPresent
  taints: []
---
apiVersion: kubeadm.k8s.io/v1beta3
kind: ClusterConfiguration
apiServer:
  timeoutForControlPlane: 4m0s
certificatesDir: /etc/kubernetes/pki
clusterName: kubernetes
controllerManager: {}
dns: {}
etcd:
  local:
    dataDir: /var/lib/etcd
imageRepository: registry.aliyuncs.com/google_containers
kubernetesVersion: 1.28.2
networking:
  dnsDomain: cluster.local
  serviceSubnet: 10.96.0.0/12
  podSubnet: 10.244.0.0/16
scheduler: {}
---
apiVersion: kubelet.config.k8s.io/v1beta1
kind: KubeletConfiguration
failSwapOn: false
address: 0.0.0.0
enableServer: true
cgroupDriver: cgroupfs
---
apiVersion: kubeproxy.config.k8s.io/v1alpha1
kind: KubeProxyConfiguration
mode: ipvs
ipvs:
strictARP: true- advertiseAddress 根据实际情况调整,配置为本节点管理网网卡的 IP,在后面添加节点时,会通过这个 IP 添加
- kubernetesVersion 在我编写本文档时最新的 kubernetes 版本为1.28.2
- imageRepository 这个时我们能在国内环境安装成功的关键,kubeadm 默认的容器镜像仓库在国外,我们是无法访问的
执行初始化命令
kubeadm init --config kubeadm-init-config.yaml初始化成功后会输出以下提示
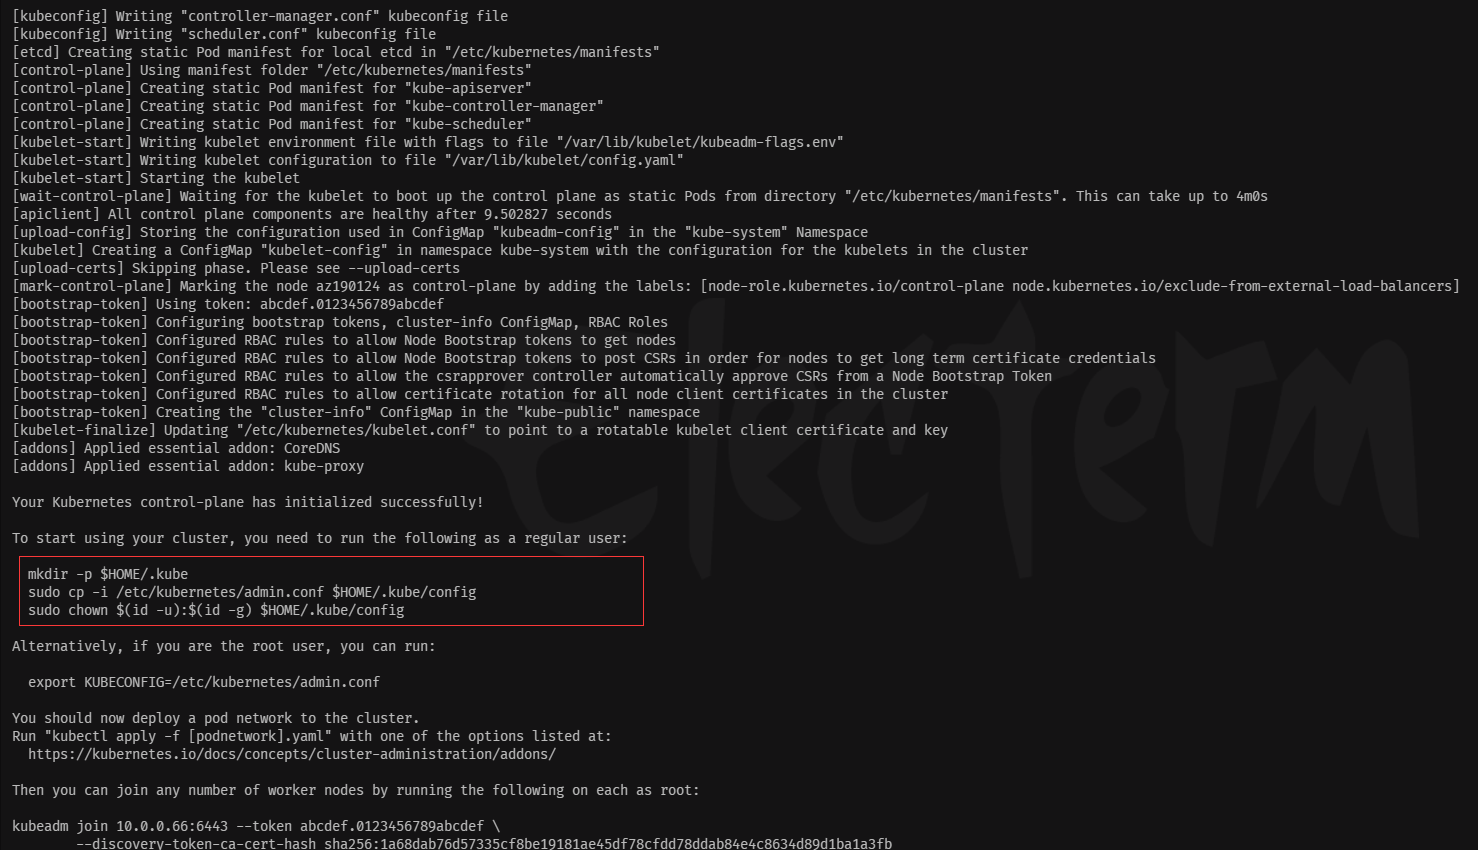
根据提示执行下面命令
mkdir -p $HOME/.kube
sudo cp -i /etc/kubernetes/admin.conf $HOME/.kube/config
sudo chown $(id -u):$(id -g) $HOME/.kube/config
然后使用 kubectl 验证

现在节点 STATUS 是 NotReady,这是因为没有安装网络插件
kubectl apply -f https://raw.githubusercontent.com/flannel-io/flannel/master/Documentation/kube-flannel.yml
安装完成后在使用 kubelet 命令验证

这时候节点的 STATUS 变成 Ready 了


文章评论